


How to Update the Firmware on Your Skybridge Plus Hotspot
When there's a new feature coming out, or you just want to make sure you're up-to-date with the latest and greatest firmware, it's important that you know how to update the firmware on your SkyBridge Plus Dual Band Digital Hotspot. That way, your the first in your circle with the newest features, and you'll never be left unequipped to get things updated. In this blog post, we'll walk you through a few steps that will show you exactly how to do so. Follow along and let's add to your DMR repertoire.
Check out the SkyBridge Plus Digital Hotspot here
First things first. Make sure your SkyBridge is plugged in and turned on and make sure it's either connected to the same WI-FI network as your computer, or just plugged into your ethernet. When your SkyBridge is completely initialized and booted up, take a look at the screen and locate the IP address (shown in below picture).

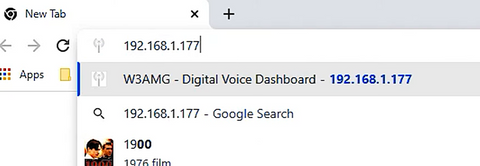
You'll want to take that IP address you just located and type it into a web browser. So shift your focus to the computer to type in your IP address in the top search bar. This should look something like the below image.
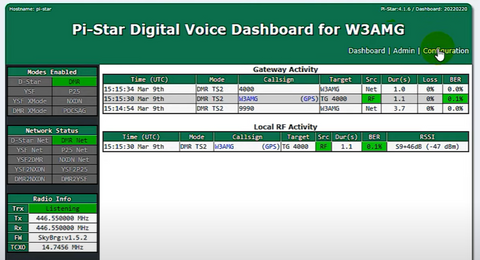
One of the great things about the SkyBridge Plus, is that it will actually show you the IP address on the SkyBridge screen. Anyone that has had to find their IP address through their router knows that this can be a time-consuming process, so having the IP on the main screen makes this a breeze. Ensure that whatever device you are using is on the same network as your SkyBridge, and then search the IP address. After you perform the search, you should end up on a Pi-Star page that looks like this.
Once you know your on the right page, click on the 'Configuration' panel. This will pop up another window that prompts you for a username and password. You can use the login information below to get signed in if needed.
Username: pi-star
Password: raspberry
Once we sign in, the next screen you will see is our main configuration panel. Now, we just need to locate the update button, so we can finish out this process.

Click on update, and now you should see the system going through the update process.
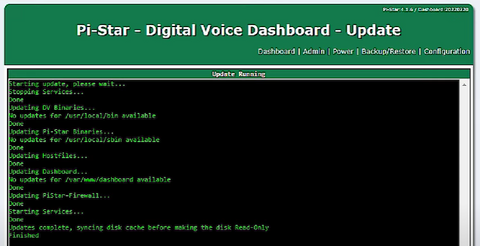
Once the update is complete, we should see 'finished' at the bottom of your update screen. If its been a minute since you performed an update, this part might take a little while, so don't be concerned if your waiting for a few minutes during the update.
And that's how it's done! Nothing too complicated here, but hopefully you now know how to quickly update the firmware on your SkyBridge Plus Digital Hotspot.
Check out the SkyBridge Plus Digital Hotspot here
Check out the SkyBridge Plus Digital Hotspot here
First things first. Make sure your SkyBridge is plugged in and turned on and make sure it's either connected to the same WI-FI network as your computer, or just plugged into your ethernet. When your SkyBridge is completely initialized and booted up, take a look at the screen and locate the IP address (shown in below picture).
You'll want to take that IP address you just located and type it into a web browser. So shift your focus to the computer to type in your IP address in the top search bar. This should look something like the below image.
One of the great things about the SkyBridge Plus, is that it will actually show you the IP address on the SkyBridge screen. Anyone that has had to find their IP address through their router knows that this can be a time-consuming process, so having the IP on the main screen makes this a breeze. Ensure that whatever device you are using is on the same network as your SkyBridge, and then search the IP address. After you perform the search, you should end up on a Pi-Star page that looks like this.
Once you know your on the right page, click on the 'Configuration' panel. This will pop up another window that prompts you for a username and password. You can use the login information below to get signed in if needed.
Username: pi-star
Password: raspberry
Once we sign in, the next screen you will see is our main configuration panel. Now, we just need to locate the update button, so we can finish out this process.
Click on update, and now you should see the system going through the update process.
Once the update is complete, we should see 'finished' at the bottom of your update screen. If its been a minute since you performed an update, this part might take a little while, so don't be concerned if your waiting for a few minutes during the update.
And that's how it's done! Nothing too complicated here, but hopefully you now know how to quickly update the firmware on your SkyBridge Plus Digital Hotspot.
Check out the SkyBridge Plus Digital Hotspot here
1 comment
Well explained. Like rveything with D 878 and Skybridge: quick and Easy !