


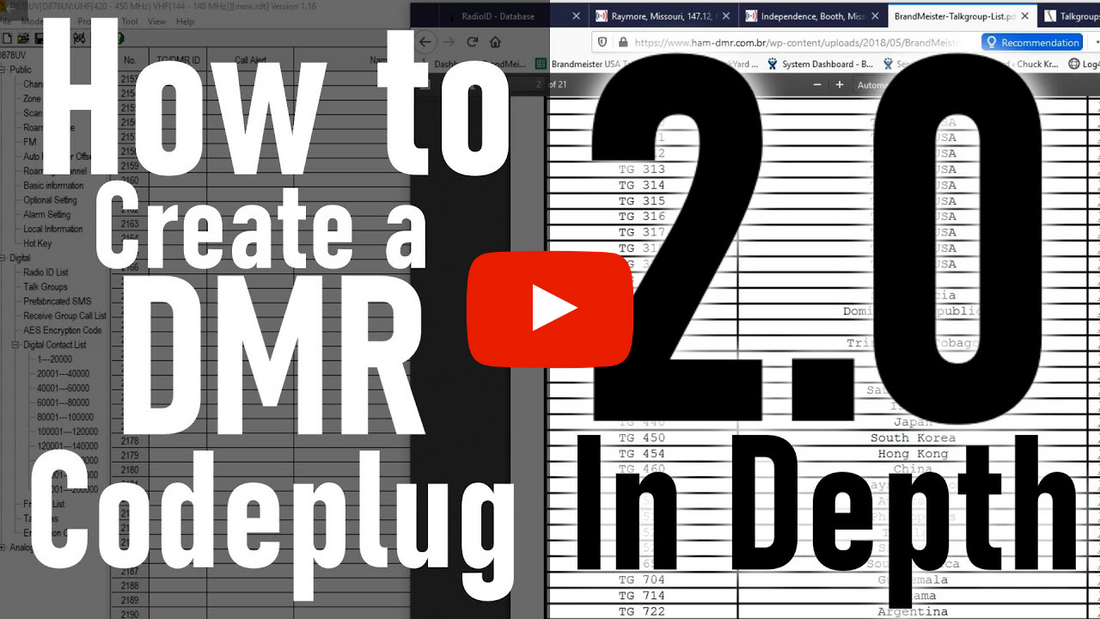
How to Create a DMR Codeplug 2020
Sebastian (KBØTTL) gives an in-depth tutorial of how to create your own DMR Codeplug for your DMR Radio:
Click here to see our best selling radios - https://bit.ly/37ARNZY
Transcription:
This is Sebastian KBØTTL. If you're just now getting your brand new radio out of the box and are wondering what to do next, this would be the video here for you. This would be part one of creating your first custom code plug for your new Anytone UV878, 868, or 578. The process will be almost completely similar for the three models. What we're showing in front of you now is CPS version 1.16 with the model 878. So this would give you a pretty good idea of how it is that you're going to get started here with your new radio.
All right, so with your radio turned on, with your cable plugged into your computer, with the other end of your cable securely fastened to the side of your 878, 868, or 578, let's go ahead and turn the radio on, power the radio on. The first thing we're going to do is read the code plug that is inside of the radio. If you get that error, we're just gonna go ahead and select the communication port which should just now be coming up in your computer. Note that if you're running Windows 10, your computer will automatically detect your radio. If you're running Windows 7, your computer might automatically detect your radio. If your computer is not detecting your radio, then you may need to install the third-party GD32 com port driver. Most of the time you will not have to do this.
Let's go ahead and read the data that is currently in the radio. Okay, from here, we're gonna go ahead and modify the data that is already in the radio, and we're gonna add a few things so that we can get started on our DMR journey here. The first thing to note on your radio is that you're going to wanna go ahead and add your DMR ID information and call sign. There's a default DMR ID or radio ID in your radio of 12345678 and the ID name My Radio. With the information that's in here, you'll be able to go ahead and enter in analog frequencies and you'll be able to talk on analog repeaters. If you happen to program in a digital repeater, you'll be able to listen in on whatever talkgroup is on that repeater, but you will not be able to transmit to that repeater. For that, you're going to need to go ahead and put in your radio ID. Your radio ID is obtained for free at radioid.net. You'll need to register to get your free radio ID or DMR ID from radioid.net. We have other videos available which show you how to complete that process. That is not in the scope of today's video.
Okay then, so assuming that you already have obtained your radio ID from radioid.net, we're just gonna look at mine here, Sebastian KB0TTL, the radio ID that radioid.net has assigned me. And of course for your radio, you'll be using your own. Enter your radio ID in the top line. In this bottom line, it's just best to put your first name and call sign, so for my case here, I'm gonna put Sebastian KB0TTL and press OK. So this radio is now set up for radio ID Sebastian KB0TTL.
Next we're gonna go ahead and enter in some channels. To start out with, let's go for a local analog repeater. We'll start out basic and then we'll get more complex as we need to. We're just gonna click right up here in channel one and this box here is going to pop up. We have our receive frequency, our transmit frequency. We're gonna leave this in analog because we're putting in an analog frequency. Here are our power levels. They're going to differ by radio model. If you're using a handheld, turbo is the highest power. It's gonna be seven watts. If you're running a mobile radio, turbo's gonna be high power or 50 watts on UHF and VHF, and then five watts on 220 if you're using the tri-band mobile. Bandwidth in the ham bands for analog, it's gonna be 25 kilohertz. For digital it's going to be 12 and a half, and for commercial, whether analog or digital, it's always gonna be 12 and a half. We should ignore the following settings and leave them as is. Our subaudible tone, CTCSS-DCS, and squelch mode carrier. We're going to leave squelch mode set to carrier.
So for our analog repeater, here's a local one. Here's one of my personal favorites, Raymore, Missouri N0HV. I can reach this repeater from most parts of the Kansas City area. Got a nice Southern or Southside amateur radio club is what they call it. Southern location, but most of the Kansas City area can hit this repeater without a problem. Receive frequency, 147.120. Transmit frequency, 147.720. CTCSS, they have it on both transmit and receive, so we're gonna put it on both transmit and receive on our side here as well. Then analog frequency, we want high power. Actually, we want turbo power, seven watts. Bandwidth is 25 kilohertz wideband. Select 151.4 CTCSS for transmit and receive. This repeater is 151.4. Channel one is now an analog repeater, 147.120.
For channel two, we're gonna do something slightly different. For channel two, we're gonna program in a local digital or DMR repeater. You'll wanna pay special attention to a few of the things that we're gonna do here. Before we put our DMR repeater in, though, we're going to need to load in a list of our talkgroups, which is available in CSV format from the BrandMeister website. We're then also going to need to go ahead and load in our contact list so that when we receive other people's DMR IDs while conversing with us here, the radio will translate that over into their name and call sign. So we're gonna go ahead and import both of those right now. The contact list that we have here was obtained from radioid.net here as well, from the database dump files. I believe user.csv is what we use here. And that is our contact list. So I already have that downloaded here. So we're gonna go to Tools Import. What we're interested in is digital contact list. And I've saved mine two demos. This is the one that we've downloaded.
Okay, and then talkgroups. I'm gonna show you where I got talkgroups in here in just a second. It's a CSV file. Or one of the sources you can get it from here is the BrandMeister, just BrandMeister talkgroups CSV. This is one of the sources for a CSV list. You can find talkgroup CSV lists floating around the internet. DMR for dummies is a good website. I've consulted with that before, as well. Okay, so BrandMeister talkgroups. Right here, if you click CSV, it's gonna let you download. If you scroll way, way, way down, you'll be able to see all of them. You'll save the BrandMeister master list talkgroup CSV, but you'd be able to find talkgroup files like this around the web. This is just one of them.
Okay, so BrandMeister talkgroups. We're gonna go ahead and update that here. We're gonna upgrade or update our talkgroups and our digital contact list. Right, go ahead and push the import button, and it'll take just a bit here. Occasionally you'll get a talkgroup list or digital contact list that is not compatible with your radio and it'll fail to load or give you an error message. If that happens, do not worry. Sometimes the files that are uploaded are either corrupted or not in the right format. It is not difficult to find a different list on a different website or to try back in a few days as sometimes the one that's uploaded is corrupt.
And these are CSV files. These files are also compatible with Microsoft Excel or with OpenOffice, which is like a free version of what Microsoft Office would be, or open source, rather, I guess, rather than free would be a way of putting it here. So you can edit or view these CSV files in Excel or compatible spreadsheet software, which is a pretty cool little feature here, as well. And it can take just a little while to update, so we'll give it a while, and then we will go back to programming our digital channels.
All right, so our import here is complete. So now when we go over here to talkgroups, we have our fields prepopulated with our BrandMeister talkgroups that are available. When we go to our radio ID list, or rather, digital contact list, we have digital contacts up for the most recent digital contacts submitted in the radio ID database, so that's cool. All right, so to program our digital repeater in, we're gonna need that talkgroups list. We're just gonna go down, we're gonna look here. One of our local digital repeaters, one that I'm on here quite a bit, the WB0YRG repeater here in Independence, Missouri. We have a frequency pair which is pretty much the same as an analog repeater. For 440, the offset is five megahertz plus offset. We have our color code, which is the same as a CTCSS on an analog repeater. Color code regulates what signals the repeater will allow to access. This is the repeater's DMR ID. We're not going to be using it. Use time slot one for all of their BrandMeister talkgroups.
So we're gonna program all of our talkgroups in for time slot one. Time slot one is the time slot that this repeater's sysop prefers people use. I advise monitoring that as you value your ability to use certain repeaters. So color code four and time slot one. Frequencies 444.975, 449.975. Color code four and time slot one. Channel type is digital. Leave that on turbo power since it is a repeater. for all digital communications. Notice how there's no CTCSS. Digital does not use CTCSS, nor does it use squelch. Digital is either on or off, one or zero. That is unlike analog. You're not gonna be fading to halfway in and halfway out of a repeater. Basically, if your signal deviation or your data rate deviation is more than 5%, the repeater just simply isn't going to accept your transmission. So you're either completely into a digital repeater or you are completely out. So basically, a squelch is not going to be necessary on a digital repeater.
Okay, this comes to talkgroups now. You're actually on a repeater going to need to go ahead and program in an individual channel listing, that is, frequency pair, this information. You're going to need to put in an individual channel for each talkgroup that you wanna access on the repeater. Supposing we wanna go ahead and access the worldwide talkgroup on this repeater, we would leave that alone. Suppose I would rather select, and you're seeing your talkgroup list now that you just uploaded. Suppose you would rather select your state talkgroup as your primary talkgroup here on this channel. In this case, my state talkgroup would be Missouri. I would go ahead and double-click Missouri. So now I have Missouri state talkgroup. So what I'm gonna go ahead and do, since this is the WB0YRG repeater, I'm gonna say WB0YRG Missouri talkgroup for this channel and then select OK.
Now like I just told you, for each and every talkgroup that you wanna use on your repeater, you're going to have to enter into a separate channel. Suppose I would like to have worldwide for my second channel. I'm just going to go ahead and enter the information in here again. digital, four. I'm gonna change that this time because I want worldwide, WB0YRG worldwide talkgroup. Okay. There's another thing we can do here. We can just simply copy, paste. Paste the data for each of these to a separate channel. And then for each of these, we're just gonna jump in and change our talkgroup is probably the fastest way of programming these repeaters here.
And right now I'm just gonna select these random because it doesn't matter, but, oh, BYRG. That's another local one here in the Kansas City area. I want that one to be BYRG. BYRG talkgroup. And notice how all that information is the same. Bare minimum, you're gonna want certain talkgroups in here to test your radio and then to disconnect from one talkgroup and go to the next. So I'm gonna go over that here real quick. So these are going to be essential ones that you're gonna want in any code plug. You're gonna watch your talkgroup disconnect, which is talkgroup 4000, by the way. That's your talkgroup disconnect. What that does is basically suppose I'm on worldwide, and I've keyed up worldwide and I'm talking on worldwide. Well, the repeater that I've keyed up is now going to be stuck on worldwide. If I change my channel to this BYRG channel right here and I key up, that repeater's not automatically going to detect that I've keyed up on BYRG. In fact, it's still gonna be stuck up here on worldwide. So what am I gonna have to do? I'm gonna have to change channel to talkgroup disconnect, key up on 4000. The repeater will get the message, hey, he wants to disconnect. That repeater will then disconnect from worldwide. I would then set my channel to the BYRG channel, key up again, and the repeater will switch to BYRG. So that's why it's important that you have this talkgroup disconnect. It's kind of like the clutch on a manual transmission. You have to push the clutch in to disconnect and then engage in the talkgroup you want. So (laughs) you got a talkgroup disconnect.
Next I'm gonna put something in called the parrot function. Got our parrot function here. Parrot talkgroup. So if you were to get on the repeater and select the parrot talkgroup, key up and identify, a few seconds later you're gonna hear the repeater go live. You're gonna hear yourself on there identifying. So that's basically saying, hey, yeah, you are actually accessing the repeater, and yes, I'm repeating this back to you, and this is what you sound like. So from there you'll be able to adjust your mic gain or whatever else you need to make, whatever else you need to do to make your voice sound nice and pretty. So that right there is parrot. Okay, so we have our state talkgroup, worldwide, BYRG, that is, talkgroup disconnect, parrot.
And just for fun and shortness and simplicity of the video, we'll do one more here. What would be a good one? Let's put one in here that most people are gonna use. I'm in North America. Most people are gonna use North America. We're gonna put in North America, US, Canada, and Mexico, North America talkgroup. North America talkgroup. Okay then, we have successfully created our channel entries. Now there's one more thing we're gonna have to do in order for the radio to see these channels here that we've just created. First of all, I see a problem here. Channel number two. Okay, that's an analog channel. Wait a minute. Okay, we skipped over that channel for some reason. Ignore that. All the channels we're gonna use we need to name. Here's the channel name. We don't want it just coming up channel one, of course, on our screen. We wanna name it something. So this is 147.120 analog. We're gonna call it... This is an empty channel. It's gonna delete it out of there. Okay, we have to put our channels in a zone before the radio is gonna be able to see these channels.
The zones aren't automatically created for the most part. You have to create your zone. So we're just gonna say local repeaters. You can add both analog and digital frequencies to your zone. So sometimes when you... Let's just say this. Sometimes when you're adding a zone, you're gonna see all of your channels listed over here, provided they haven't already been added to a zone. You have to have at least one zone in your radio in order to write the code plug, to your radio by the way. So local repeaters we're gonna add all eight channels to the zone. We're gonna hit OK. Before you write your channel to your radio, go ahead and put your radio and frequency mode by going to optional settings, work mode. Go from frequency mode, actually, go to channel mode. You want your channels to appear on your radio, not just in a name and frequency. Now we're ready to program our radio with our basic code plug. And we want our contact list and everything to go over to our radio. Okay, so we've written our code plug to our radio. So now we're ready to use our radio.
Now back to those talkgroups. Suppose for some reason your file fails to upload or there's some kind of an error in talkgroups. These talkgroups can also be edited or a different talkgroup just simply added. Suppose you only wanna add in a handful of talkgroups and you don't want the big long lists in there. That's fine here as well. You can add the talkgroups individually, as BrandMeister also has a PDF file available which has all 1147 available talkgroups in it. There's a talkgroup number and then a talkgroup description. So say, of course, I have no reason to talk to South Korea, but say I wanted to, talkgroup 450. I can go on here, I can say South Korea. That's talkgroup 450, And I could say okay. Of course, I have no interest in talking to them, so I'm just gonna remove it. But you can add talkgroups individually or you can add a list, one or the other. And the same goes for digital contacts. So if you cannot upload the files for some reason, don't panic. You can also put them in individually in a pinch, and you can still use your radio. So again, this is Sebastian KBØTTL, and this was video one of creating your own custom code plugs. Thank you for reading.
2 comments
Will all this info work with my Betch 6×2 also? I’m having so much trouble with their software. I cant add or edit anything from the software. Its like its frozen. I’m not happy with that radio.
And i can not delete there code plug that came with the radio. Thanks for all the info on the Anytone radios. KG5DGG
QSL QAP QRZ HP1CNH 73
REPUBLICA DE PANAMÁ
WHATSAPP +507 65734518